Payroll, many managers in the hospitality industry wince at the word. But it doesn’t have to be that way. Pen & paper, phoning in hours and cumbersome biometric machines make payroll a last minute panic, but you can avoid this with a few quick and easy steps on Bizimply.
- Create The Rules For Your Paid Time
First, you must create the rules that populate the ‘paid time’ section of an employees’ Timecard. These rules are what the paid time will default to in Bizimply, and should save managers an enormous amount of time every week.
To edit/set the rules for your paid time, click on your name/email in the top right hand corner and then Settings from the drop-down. On the left hand side, select Attendance and then Attendance Settings. Here you can edit the default paid time for clocking in and out.
E.g. I’m scheduled to work from 09:00 – 17:00 today.
Clock In Times
- If I clock in at 09:20, should I be paid from my scheduled time (09:00) or clock in time (09:20)?
- If I clock in at 08:20, should I be paid from my scheduled time (09:00) or clock in time (08:20)?
Clock Out Times
- If I clock out at 17:25, should I be paid until my scheduled time (17:00) or clock out time (17:25)?
- If I clock out at 16:45, should I be paid until my scheduled time (17:00) or clock out tome (16:45)?
What’s important to remember is that these are only what the paid time will default to; a manager or admin will approve timecards at the end of the week before sending off the CSV to payroll. The defaults will be right 99% of the time, but there are occasions where these defaults need to, and can be overridden. E.g. someone forgets to clock in first thing in the morning, but a manager knows they were in work on time.
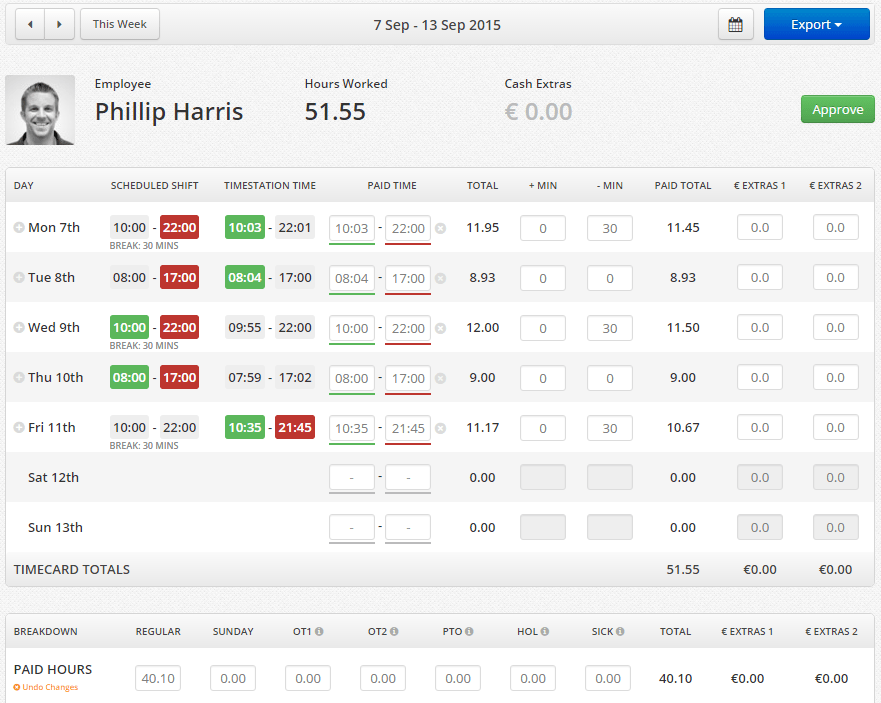
- Approve Timecards
Once your employees have clocked in and out for the week, you will need to approve their timecards so that you and your other managers know that these hours have been approved. To do this, once you are happy that the ‘Paid Time’ column is correct, simply click on the ‘Approve’ button in the upper right hand corner. This will then mark the timecard as approved so you can move on to the next employee.
- Export Information
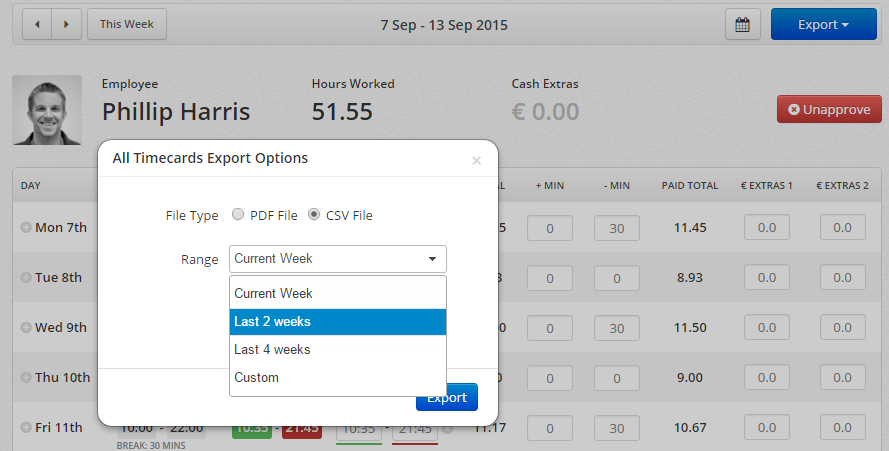
Once the timecards are approved, you can export your timecards to a CSV to send to payroll, or import to your payroll provider if you run payroll in-house. To export the file, click on ‘Export’ button in the top right hand corner. You can export to a CSV or PDF – CSVs are used for importing to payroll, whereas PDFs are visually better and good for printing off.
Choose the time period you wish to export from, current week, last 2 weeks, last 4 weeks (the usual payroll cycles) or you can choose a custom time period as well. The file will then download and you can save it locally on your computer. Send it off to your accountant/finance dept. or see the next step if you run payroll yourself.
- Send To Payroll/Import To Payroll
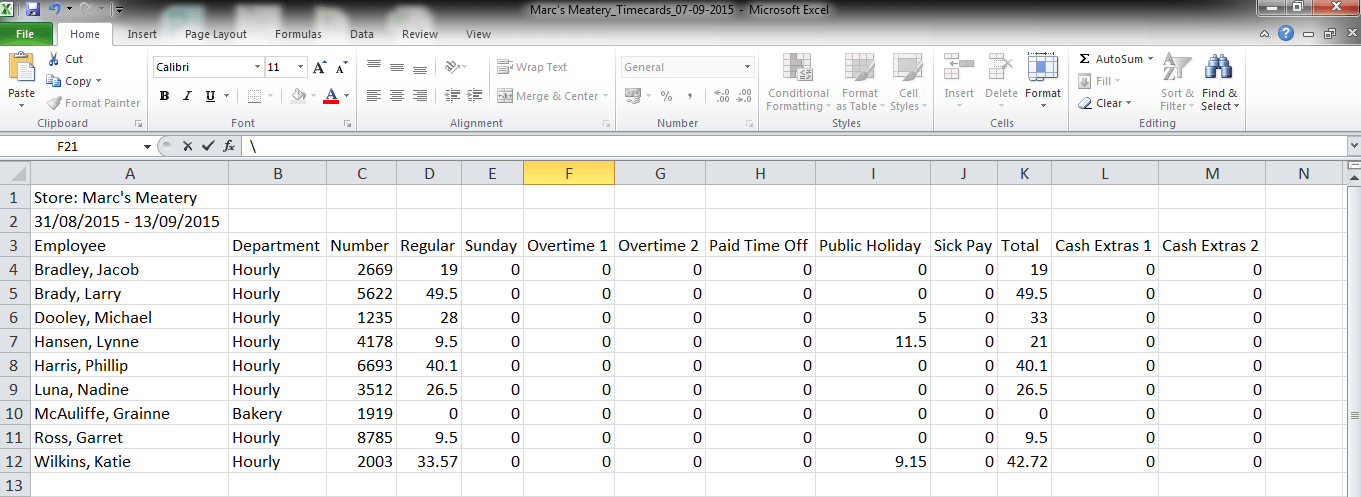
When you export timecards to a CSV for payroll, the image below is what the file will look like. This is designed to be easily edited and imported in to a wide range of payroll providers. There is such a wide range of (great) payroll providers out there, and each will be able to import CSV files.
Having a CSV file to import drastically reduces the time for HR, payroll and finance departments to process payroll. Antiquated processes such as pen and paper, managers phoning in hours or emailing a name with a number beside it indicating hours worked are a thing of the past.